Showing posts with label Create. Show all posts

Sunday, July 12, 2015

No Mayo Deviled Eggs

Hey everyone!!

I have to say that I am so grateful to be writing about food today. Why, you ask??
Because I am finally able to eat it again!

I recently had to endure some painful dental surgery, which left me able to eat pretty much nothing. So unless you guys wanted me to write about how to warm up some soup in the microwave or open a bottle of nutritional shake...I literally had nothin' for ya! 

Fortunately, I am finally on the mend and I am starting to eat real foods again, Hallelujah!!
In order to avoid unnecessary pain, I have slowly been introducing foods that are still easy to eat.
Enter...the egg.

You guys, I have something to admit.
I HATE EGGS!!!
But, they are soft and are loaded with protein which I needed to heal so, blaaahhhhh.

Scrambles eggs.....gross.
Omelettes....gross.
Eggs Benedict smothered in Hollandaise sauce on top of Canadian bacon
...now we are getting somewhere.

For me eggs have to be either covered in something or mixed in with something to be palatable, but I was brave and decided to try my hand at deviled eggs. 
Even though I had actually helped make deviled eggs a bunch of times with my mom when I was younger, for parties and such, I had never actually tried one. 

Although a lot of people seemed to like my moms deviled eggs growing up, I wanted to try something different than the classic recipe, by omitting one of the main ingredients.
Exit....the mayo. 

I'm not a fan of mayo...the smell, the look, or the taste. (You want to know one of the main ingredients of mayo...it's eggs, go figure) Now, in my mind including mayo in my recipe just sounded like stuffing eggs with more eggs, and that's not something that sounded too great to me. Instead, I opted to use ingredients that I typically like!!

So here it is, ladies and gentlemen....the no mayo deviled egg.
And I liked it!!!

*This recipe makes enough for a party or event, but I quartered it in these pictures so that it was just a little snack for Kevin and I. 

Ingredients:
8 large eggs
3 Tablespoons Greek yogurt
1 Tablespoon Dijon mustard
1 Tablespoon sweet pickle relish
1/4 teaspoon salt
Paprika and dill for garnish

Put the eggs in a pot and fill with cold water until they are completely covered. 
Bring the water to a boil.

Once the water is boiling, turn off the heat, and put a lid on the pot. (Keep the pot on the burner)
Let sit for 12 minutes. 

Drain the water, and place the eggs in a bowl filled with ice water.
Leave in the ice water until they are completely cooled.
I think mine only took about 5 minutes...but I was only making two, so they probably cooled faster than if you had a whole bowl filled with them. 
Finally, peel your eggs. 

DO NOT SKIP THE ICE WATER!!
Putting them in ice water makes them so much easier to peel and keeps them looking pretty!


If nothing else, I was determined for my eggs to look pretty. 

Cut the eggs in half, and scoop the yolks into a bowl. 


Mash them up with a fork and then add the remaining ingredients. 

If your mixture looks too dry, add either more yogurt or more mustard. Taste test it first, to see which flavor it could use more of. 

Spoon your mixture back into the whites.
Garnish with paprika and dill. 


Sunday, June 1, 2014

Not Your Momma's Four Layer Dessert

Along with this weeks recipe, a lot has happened this weekend so bare with me as I ramble on for a minute. 

First off, my best friend since pre-school got engaged!!!!
I'm not going to lie I cried like a baby...a big big baby....there was even a witness.
I would just like to say that there is absolutely no way to prepare for a moment actually occurring that you and your best friend have talked about for two decades.
I couldn't be happier for her and I can't wait to see the bridesmaid dresses!

Second off, I put on my big girl pants and bought my first piece of expensive furniture (a loveseat) for me, and me alone. 
I say it is for me alone because it is my dream piece of fancy girly furniture and Kevin had absolutely no say in picking it out. 
It does not match the dark leather sofa that we have at all but somehow the stark contrast between the two perfectly symbolizes the two completely opposite people coming together in one living room. (man that was a really sappy way to describe a living room right?) 
I wish I could show you, but it's going to take up to four weeks to get here which makes me very sad but I have very pathetically put blue tape on the floor to try and imagine how it will look once in the room. 
All I can say is that if Kevin comes anywhere near it with his hot sauce and dirty boots, I'm going to beat his butt. 

Ok, on to the recipe!!

The reason I call this "Not Your Momma's Four Layer Dessert" is because it kind of reminded me of the layered dessert my mom always used to make, which included a crust with nuts (yuck-no nuts), a layer some sort of delicious cream cheese concoction, a layer of chocolate pudding, and a layer of whipped cream.
The only difference is that I have adapted every layer into things I like even better.

Plus this has three layers, not four, because laziness is sometimes a virtue.


Ingredients:
1 (16 1/2 oz.) tube of pre-made chocolate chip cookie dough
1 jar of caramel ice cream topping
1 (3.4 oz.) box of dry instant vanilla pudding mix
1/2 cup of cold milk
1 (8 oz.) container of frozen whipped topping
3 1 oz. squares of semisweet Bakers chocolate
3 tablespoons of butter 
1 bag of Heath toffee bits
9x13 baking pan


First, very lightly grease your baking pan and preheat your oven to 350 degrees.
Break your dough into pieces and drop them all around your pan.
Use your hands to press them down and into one big piece. Try your hardest to make it all even so that every piece will have the same amount of cookie at the bottom.

While taking pictures of this, I noticed my counter tops look a lot
like cookie dough...not a bad thing in my opinion. 
Pop that in your preheated oven for 14-16 minutes, or until golden brown.


Let your cookie cool completely before starting your next step.
In the meantime, you can drool over the ingredient for your next layer...
You will also need to take your frozen whipped topping out of the freezer and allow it to thaw.


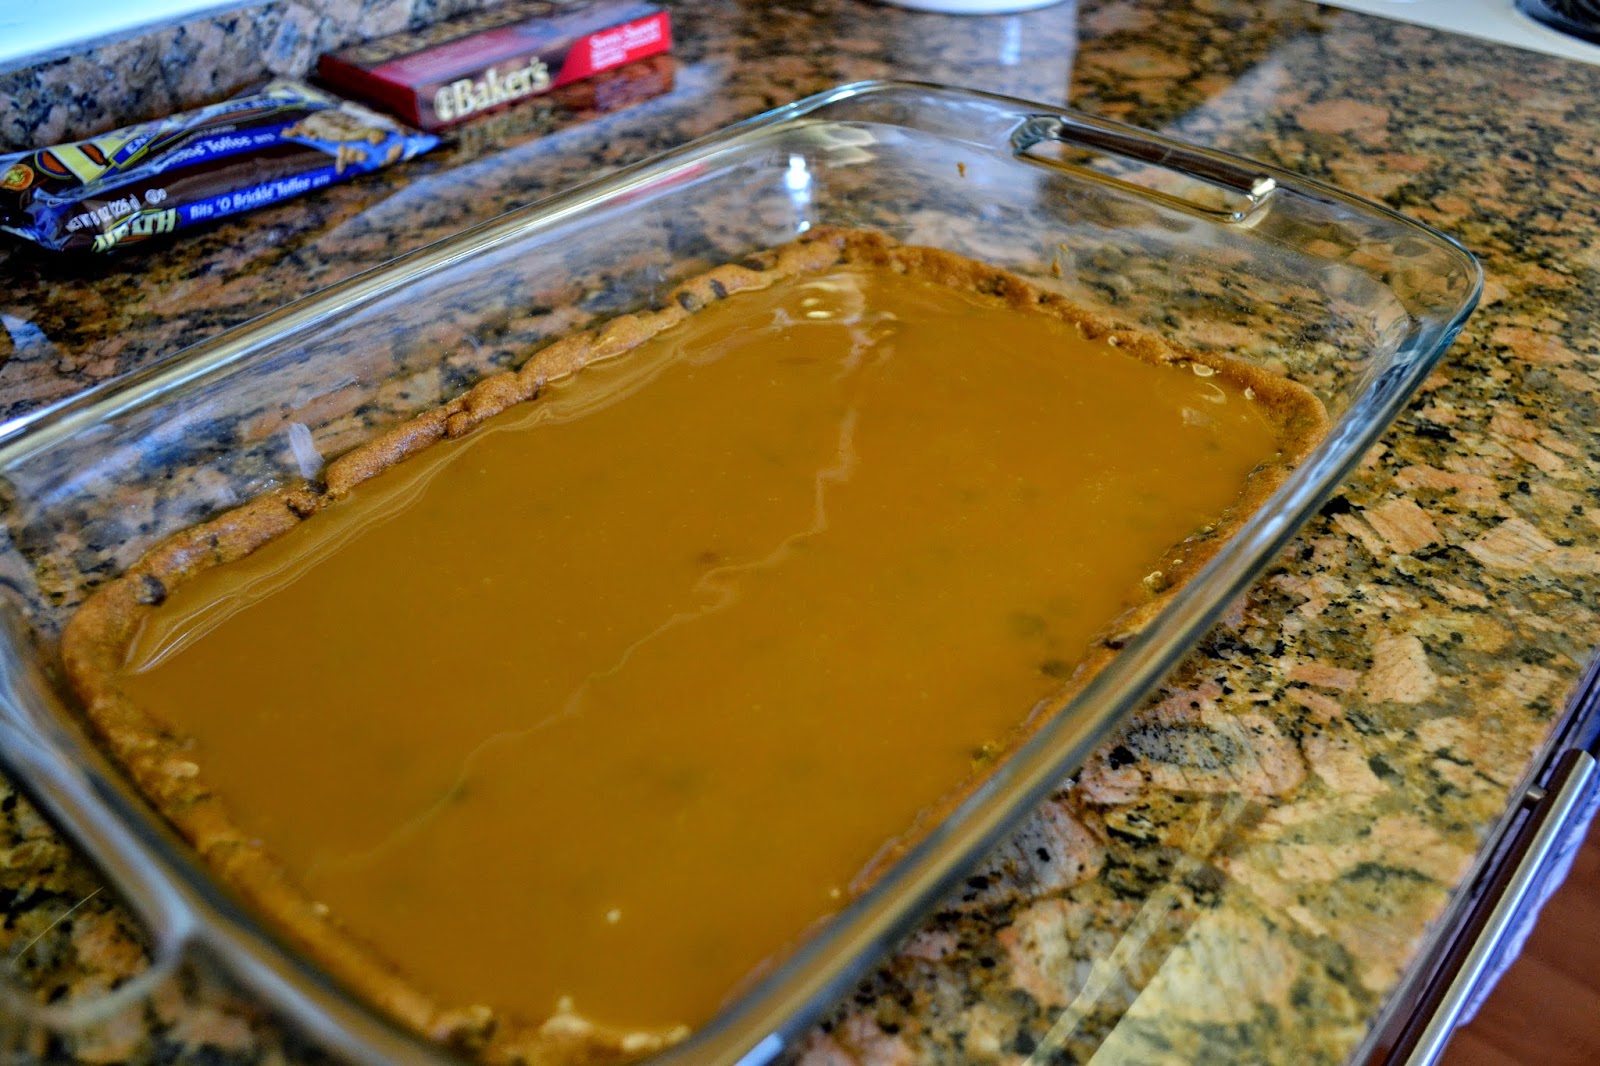
Once the pan is cool to touch, you are ready to spread on your caramel.
Pour on just a little at a time and spread it around, just enough to cover to whole cookie.


Look at that ocean of salty sweetness...yum!
Your next layer is going to be a mixture of vanilla pudding and the whipped topping. 
First, make your pudding by mixing the dry mix with 1/2 cup of cold milk.


Whisk that together until completely blended and then add the thawed whipped topping. I added a little bit of the Heath bits also just to give this layer a little crunch!! 
Fold the whipped topping and Heath bits into the pudding mixture until completely blended. 


Spread the mixture evenly over your caramel layer, cover the pan and put in the freezer for 3-4 hours to allow for everything to firm up. 

Once your layers are firm, it's time to make your topping.
First, roughly chop three 1 oz. squares of semi-sweet chocolate.


In a small sauce pan, melt 3 tablespoons of butter on medium heat. 


Once the butter is completely melted, add the chopped chocolate and stir constantly to make sure that the chocolate doesn't burn.


With a spoon, drizzle your melted chocolate over your frozen layers. 

I have a very heavy "drizzle" hand apparently

Sprinkle on some of your Heath toffee bits. 


Put back in the freezer to left everything harder again before cutting into squares and serving!!


Happy Sunday!!

Meanwhile I'll just be here pretending to lay on my new loveseat for four weeks until it gets here...

Yes, those are my moo cow pajama pants.

Sunday, May 25, 2014

Weeknight Enchiladas

There are about a million and one ways to make enchiladas (green sauce, red sauce, chicken, beef, etc. etc.) but the steps involved sometimes seem a little daunting. 

This is a simple recipe that is easy enough to make even after a long day. This week was a crazy one for me, and I even had the time to make these tasty little suckers. 

One of my favorite things about this recipe in particular is that it has lots of chili powder, which happens to be one of my personal favorites in the spice cabinet!!!!
I'm all about that smokey flavor. 

Ingredients:
1 lbs. of ground beef
1/2 cup of chopped onion
1 can (14-1/2 oz) drained diced tomatoes 
1 can (6 oz) tomato paste
1/2 cup of water
3 teaspoons of chili powder
1-1/4 teaspoons of salt 
1/4 teaspoon of pepper
Flour tortillas 
Shredded cheddar cheese


First, chop the onion and add to a pan with ground beef. 

Cook on medium heat until beef is browned on the outside.
Strain the fat out of the pan, and then add the meat and onion back in. 


Removed from the heat, add in the tomatoes, tomato paste, water, chili powder, salt and pepper. 


Next, it's time to set up your assembly line for filling your tortillas.
Set out your filling, tortillas, cheese, and lightly greased casserole dish.

I use the small tortillas for this dish, well because they are just too darn cute that way!

When filling your tortillas, keep in mind that your going to need to save some of the filling to pour over the top, so don't use it all for the tortillas.


Fill your tortillas (not too much, where you can't close it) and sprinkle with cheese.


Roll, and place seam side down in your casserole dish. 


Pour the remainder of your filling over the top. Notice that the filling isn't thin and soupy....another reason I love this recipe!!!


Top with cheese, cover with foil and bake in the oven at 375 degrees for 25 minutes. Uncover, and bake for another 3-5 minutes. 


A lot of times when I make this, I will double the recipe and keep the second casserole dish in the freezer for an even easier meal another night. 

Everyone is jealous when I bring these leftovers to work because they smell amazing! 
Plus like I said, everyone thinks they were a lot of work...shhhh don't tell them how easy it was!!!

Sunday, May 11, 2014

Mother's Day Lemon Cake

My mom loves lemon, so for this Mother's Day Sunday I decided to make a lemon cake.

Perfect for spring and summer, this is a dessert with the freshness of a tart lemon.
 Plus it's one of the easiest treats you can make!


Your ingredients include: 

For the cake:
1 package of yellow cake mix
1 dry 3 oz. package of lemon Jello-O gelatin
4 eggs
3/4 cup of water 
3/4 cup of vegetable oil

For the glaze:
2 cups of powdered sugar
6 tablespoons of lemon juice or 2 juiced lemons

First, combine cake mix, gelatin powder, water, eggs, and vegetable oil in a mixing bowl, and mix well until blended. 


Pour batter into a greased 9x13 glass baking pan, and bake at 350 degrees for 35 to 40 minutes until golden brown on top and an inserted toothpick comes out clean. 


After the cake is removed from the oven, use a the handle of a wooden spoon or a wooden skewer to poke holes in the cake so that when you pour the glaze over it, the cake will soak some of it inside. 


For the glaze, whisk together the powdered sugar and lemon juice until smooth. 


When the cake has slightly cooled, pour the glaze over the cake and spread it evenly. 


Refrigerate the cake to allow the glaze to harden. When completely cooled, cut the cake into cute little squares and eat!!!


Refrigerate left over cake to keep fresh. 

Sunday, May 4, 2014

Crock Pot Creamy Chicken Noodle Soup

I apologize in advance for the lack of preparation pictures for this blog post.
This was the first time making this recipe and I was unsure about how it would turn out but it ended up being so good that I had to post this weekend despite the absence of pictures.

I am not usually a fan of chicken noodle soup. Truth is, I am not of fan of most soups that are broth based because they never quite seem to fill me up. 

This soup is perfect because it's creamy, it's filling, and it's super easy.

This is what your going to need:

1 (10.75 oz.) can of cream of chicken soup
1 (10.75 oz.) can of cream of mushroom soup
5 cups of milk (I know it's a lot, but you could cut the recipe in half if you like)
9 oz. of mixed frozen vegetables
2 cooked chicken breasts, shredded 
2 cups of uncooked egg noodles
Salt and pepper to taste (I added a little garlic salt, because it's my favorite)

Cook the chicken ahead of time, or buy pre-cooked chicken and make your job even easier. 

To your crock pot add both cans of soup and the milk. 
Whisk together until blended. 

Add and stir frozen vegetables and chicken. 

Set crock pot to low for 5-6 hours or high for 3-4 hours.

During the last 30 minutes to an hour (depends on your heat setting) add the uncooked egg noodles, and that's it.
 Told you it was easy. 

Enjoy!!


Sunday, April 27, 2014

Banana Bread

Ok, so after making Frozen Chocolate Covered Banana Peanut Butter Sandwiches a few weeks ago I kind of kept on a banana craze.

Well after a while I just couldn't keep up with how fast the little suckers were ripening, so I found myself with four ripe bananas and nothing to do with them.

When in excess of the fruit, it's time to make banana bread.


This is not a banana NUT bread because I hate nuts in my food but add nuts into yours if your a fan. 

This recipe is so incredibly easy, and everyone will be impressed on how it looks and how amazing it tastes!

This is what your going to need:
1/2 cup of butter
1 cup of sugar
2 eggs 
4 ripe bananas 
1 1/2 cups of flour
1 teaspoon of baking soda
1/2 teaspoon of salt
1/2 teaspoon of vanilla
and a loaf pan

My bananas were frozen, thats why they look so weird. I do not
recommend freezing while they are still in the peel.
They become impossible to peel and it's not a pleasant process. 

First, combine the flour, baking soda, and salt in a bowl.


In a separate mixing bowl, add the sugar and softened butter. 


Mix until fluffy. 


Next, your going to mash the bananas and yes it's going to look gross. 


Add those mashed bananas and eggs to your mixing bowl, and mix until blended. 


Next your going to sift your four. I used to never do this, but the more I bake the more I realize how much better it makes things taste texture wise.
If you don't have a sifter, don't panic.
I have made plenty of recipes without following the directions and sifting, and they have turned out just fine. 

Sift your flour mixture into your mixing bowl, and add the vanilla. 


Mix until completely blended. 


Next, your going to prep your loaf pan. 
Spray the pan with cooking spray and then sprinkle with flour to further prevent sticking. 
Knock out any excess. 
(Adding the flour is yet another thing that most people avoid when baking but it really does help)


Add your mixture, and at this point it will already smell amazing!


Pop it in the oven at 350 degrees for 60 minutes.

At the end, this is what it will look like!!


While baking, don't get freaked out about how dark the outside is getting.
 Everything will be ok!! 
With all of the natural sugars in the bananas this crust forms on the outside but don't worry, it's not as tough as it looks. In fact even the crust stays moist in this recipe and it's actually my favorite part!

After the pan is completely cooled, run a dull knife around the edge to loosen it up and it should come out easy peasy. 


To keep fresh, I would recommend wrapping it in plastic wrap. 
It is not necessary to refrigerate but you can if you like.
If you do refrigerate, the bread will become harder when you cut it. Just pop your slice in the microwave for a couple of seconds and it will be delicious, soft, and warm!!!